Introducing Italic Calligraphy: What It Is And How To Do It

- What is Italic Calligraphy?
- Where Did Italic Calligraphy Come from?
- Where to Use Italic Calligraphy
- Types of Italic Calligraphy
- How Does Italic Calligraphy Differ from Modern Calligraphy?
- What are the Tools Needed in Italic Calligraphy?
- What are the Rules in Italic Calligraphy?
- How to Write Italic Calligraphy
- Conclusion
Do you love the look and feel of calligraphy? Have you tried it yourself? Italic calligraphy is a great way to get started in this art form. It's more casual than other styles, perfect for beginners.
In this post, we'll look at everything you need to know about this writing style and how to get started. So read on to learn more!
What is Italic Calligraphy?
Italic calligraphy is a lettering style characterized by its slanted letters and easy-to-read italicized writing. It is a more cursive form of lettering and is speedier to write.
The slanted letters give italic calligraphy a more handwriting-style look and feel. Unlike other calligraphy styles, italic calligraphy is relatively easy to learn and can be mastered by beginners with some practice.
The Origin of Italic Calligraphy

You may have heard about italic calligraphy for some time, but did you know it dates back to the 15th century? That's right - this popular writing style has been around for centuries!
The Italic script (also known as Cancellaresca) was created in Italy during the Renaissance period (14th to 15th centuries). It is claimed that the Florentine humanist Niccolò de' Niccoli used a cursive script of the Humanist minuscule to transcribe books for his use.
Humanist minuscule is handwriting or style invented in secular circles in Italy at the beginning of the fifteenth century. It is said that it was too time-consuming to write. So, a new way of writing (italic calligraphy) was born to make the transcribing of books quicker!
In 1935, Dryad Writing Cards was popular and considered one of the best examples of Latin cursive writing. It has been used to teach young school children to write an italic hand. It had a great influence on the calligraphic styles that followed throughout Europe.
The italic script consists of more condensed letterforms than those found in the Humanist minuscule. The letters are also slanted, making them appear to be written in a hurry - perfect for someone who wants to save time!
Where to Use Italic Calligraphy

By the time italic calligraphy reached the 20th century, it had become a popular choice for individuals who wanted to add a touch of class to their correspondence. Today, italic calligraphy is still used for this purpose. It is also commonly seen in books, magazines, and other published materials.
And because of its elegant style, this calligraphy is often used for invitations, notes, and other informal communications. If you gaze around, you will find italic calligraphy in many public places because this type of calligraphy has been used by business and government organizations for signage and other purposes.
It is also often used in the branding of products and services. You may have seen italic calligraphy used in the logos of some companies and even for personal purposes like love letters.
With its versatility, it is not surprising that italic calligraphy is one of the most popular forms of calligraphy. If you are interested in learning this type of calligraphy, many resources are available to help you get started.
Types of Italic Calligraphy

Italic calligraphy written in different styles - Image by Calligraphy Master & Vivian
There are many different types of italic calligraphy, but the two most common are formal and informal. Formal italic calligraphy is usually used for invitations and other special occasions, while informal italic calligraphy is more suitable for everyday writing.
These types are often used interchangeably, but it is important to know the difference to choose the right style for your needs. Let’s look at how these two differ in writing style.
Italic Calligraphy Vs. Modern Calligraphy
Although modern and italic calligraphy shares some similarities, there are also some important differences. Modern calligraphy is usually written with a pen or brush, while italic calligraphy is written with a quill. This means that italic calligraphy has a more traditional look and feel. Additionally, italic calligraphy often uses a serif font.
Let's see how italic calligraphy differs from:
Faux Calligraphy
Italic calligraphy is often confused with faux calligraphy. Faux calligraphy is a more free-form style of writing that doesn't require specific tools or training. It's a great way to start calligraphy if you're unsure you want to commit to the practice. However, italic calligraphy is a more formal style of writing that uses specific tools and techniques.
Hand Lettering
Hand lettering is another type of calligraphy often confused with italic calligraphy. This calligraphy style is a more decorative form of lettering that often uses embellishments such as flourishes. In comparison, italic calligraphy is a simpler style of writing that focuses on letters.
Pointed Pen Calligraphy
While you can write italic calligraphy using any pen, pointed pen calligraphy uses a pointed pen to create thick and thin lines.
Brush Pen Calligraphy
Brush pen calligraphy is similar to italic calligraphy as it uses a broad-edged pen to write. However, with brush pen calligraphy, the writer uses a brush pen instead of a nibbed pen.
The Tools You Need in Italic Calligraphy
There is no exemption when it comes to the tools that are needed in italic calligraphy. You can use any writing tool as long as it has a pointed tip. The most common tools used in italic calligraphy are:
Dip Pen

This pen is also known as a nib pen. It is a pen with a metal nib at the end, split into two tines. The tines are bent to form a point. Dip pens come in different sizes and they are not hard to find.
You can buy them on your local store or online. If you are a beginner, you can try the trial pen set, just in case you have a tight budget. You can always get something expensive and professional grade later on.
Ruling Pen

Hand holding a ruling pen - Image by Jeea Mirza
This tool is used to create precise lines. It is made up of two metal plates that are hinged together. The ruling pen is dipped in ink, and the user drags it across the paper to create a line.
It has a hardened plated steel nib that you can use for calligraphy and painting. When choosing a ruling pen, make sure to find one with a width that can be easily adjusted to different lines. It is also best to choose one that is simple and quick to use.
Brush Pen

As the name suggests, this pen has a brush tip instead of a nib. Brush pens are great for beginners because they are easy to control. If you prefer a real brush, you can choose the natural hair bristles type.
But if you want something more affordable, you can go for a synthetic kind. This type of brush pen mimics an actual brush pen, which also works perfectly for hand lettering and calligraphy.
Felt-Tipped Marker

A woman holding felt tip pens - Image by Cindy Guentert Baldo
This marker is filled with ink held in place by a felt tip. Felt-tipped markers are great for beginners because they produce thick and thin lines depending on how you hold them. They also provide precise lines making it perfect for professional calligraphers.
When choosing a felt-tipped pen, try to find one that is quick-drying and water-based. Those products will not smear and won't bleed through paper.
Fountain Pen

This pen has a nib dipped in ink, and then the user drags it across the paper to create a line. These are great if you want a pen that will produce consistent lines. Fountain pens improve your handwriting because of their ergonomic design.
They lessen hand fatigue and cramping while allowing you to write for more extended periods. They are also more expressive and customizable than other pens. In some cases, they may even be less expensive than ballpoint pens.
Ink
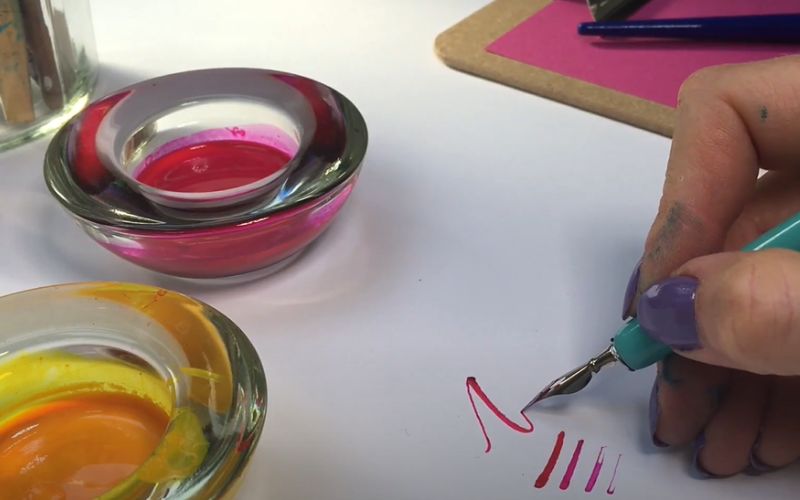
Yellow and pink ink on a white surface - Image by Kirsten Burk
Ink is what you use to fill your pen with color. There are many different inks, but the two most common are water and alcohol-based. When choosing the best ink for your project, remember the paper you will use.
If you are using water-based ink, ensure your paper can hold up to the moisture, or it will bleed through. The same goes for alcohol-based inks and bleeding. If you are unsure which type of ink to choose, many great resources online can help you decide based on your project.
Paper

A woman holding a calligraphy paper - Image by Vivian
Calligraphy paper is one of the essential tools but is often overlooked by beginners. Some people believe that paper doesn't matter, but the truth is that it does. Paper can make or break your calligraphy experience. You can use practice papers great for beginners or purchase calligraphy paper.
You should seek low-absorbent smooth paper since ink bleeding is one of your most severe problems during practice. You should also consider the combination of ink and paper. For instance, if you're using water-based ink, you'll need to use paper to absorb the moisture, so it doesn't bleed through.
The Rules in Italic Calligraphy
When learning italic calligraphy, you should start with the basic rules. It is crucial to know these rules inside out before breaking them. So what are these rules?
The Letter Size
The first rule is to write all the letters between two imaginary lines. The upper line is called the ascender line, while the lower one is called the descender line. This rule will help you maintain consistent letter sizes throughout your writing.
The Pen and Letters Angle
The next rule is about the pen angle. When holding the pen to write italic calligraphy, the nib should be at an angle of approximately 45 degrees. This will give you the thinnest downstrokes and the thickest upstrokes.
The Connections
The next rule has to do with the connections between letters. In italic calligraphy, you must connect all letters to give the writing a flowing, continuous look. There are some exceptions to this rule, but let's focus on the general rule for now.
The Strokes
Now let's talk about the actual strokes themselves. Italic calligraphy is written with a broad-edged nib, meaning each stroke's width will be the same. This is different from pointed nib calligraphy, where each stroke can be as thin or thick as you want it to be. There are four basic strokes in italic calligraphy:
Upstroke

Woman writing upstrokes on a white paper - Image by Pieces Calligraphy
The upstroke is just what it sounds like: a stroke that goes up. When writing the upstrokes, do not press your pen harder to ensure you get thinner lines.
Downstroke

Writing upstrokes and downstrokes on a tracing paper - Image by Joyce Christine
The downstroke is the opposite of the upstroke, the thicker lines you see in the sample image above. When writing the downstrokes, press your pen harder so you can make thicker lines.
Curved Stroke

Writing compound curve stroke on a tracing paper - Image by Pieces Calligraphy
The curved stroke is used for letters with a round shape, like 'o' and 'e.
Looped Stroke

Sample writings of looped strokes - Image by Kellycreates
The looped stroke is used for letters with a loop, like 'g' and 'y.
Now that you know the basic strokes try writing them yourself! Experiment with different letters and see what you can create. Italic calligraphy is a fun and unique way to add personality to your writing. But of course, we will not leave you in the process. So read on!
How to Write Italic Calligraphy
Now that you know the basics of italic calligraphy, it's time to learn how to write in this fun and engaging style! Lets now explore:
- The first step to writing in italic calligraphy is to find the right pen. You will need a pen with a fine tip to create thin and thick lines.
- Next, hold the pen at a 45-degree angle. This is different from holding a regular pen or pencil, so it may initially feel strange.
- Once you have the pen correctly, you can start practicing the basic strokes.
- The next step is to start writing some letters. Begin with a simple letter, such as an "a" or "b." Follow the guidelines above for writing more letters
- As you write, keep the pen at the same 45-degree angle. You will notice that the strokes are different than if you were writing in print. The downstrokes are thick, while the upstrokes are thin. It is one of the characteristics that make italic calligraphy so distinctive.
- Once you feel comfortable with the basic strokes, you can practice more complex letters.
As a beginner, following instructions can be daunting most of the time, but don't worry as we've always got you covered. You can check out the video below to see how italic calligraphy is done in action.
Conclusion
While italic calligraphy may seem like a more complicated form of calligraphy, it is quite simple to learn. The key is to practice regularly and to use the proper tools. With a little bit of practice, you will be able to produce beautiful italic calligraphy that will impress your friends and family.
Have you tried calligraphy yet? Let us know your experience in the comments section below!
Why Trust Glytterati?
Our team of editors is passionate about art and craft projects, so we only recommend products that we genuinely believe in. We provide honest, unbiased reviews of the best art supplies, and we often consult with industry experts to make our content professional and friendly, even for beginners. So if you're looking for new ways to improve your creativity, we can help!