3 Quick Tips To Perfect Your Watercolor Wash Technique

Who doesn't love an excellent watercolor wash? It's one of the most popular painting techniques that artists use to create beautiful masterpieces. If you're having some trouble perfecting your technique, then this blog post is for you! In this tutorial, we'll give you the four basic watercolor washes plus one secret that artists rarely divulge.
To do a basic flat wet watercolor wash, tape your watercolor to a drawing board. Dip your flat brush into a jar of clean water and apply it to the paper until it becomes shiny. Load your brush with water and watercolor. Apply quickly in sweeping strokes, then blend evenly.
What You'll Need
- Flat board
- Flat watercolor brush
- Mop watercolor brush
- Watercolor paper
- Watercolor paint
- Rag or paper towel
- Painter's tape
- Water dish or glass
- Palette
Step-by-Step Instructions
Tape the watercolor paper on a flat board.
When doing watercolor washes, always start by taping your watercolor paper on a flat board to avoid buckling and crumbling when the paper dries. The thin board (clipboard, a piece of plywood, magnetic board, or glass) helps when you tip the paper to make the watercolor flow.
Wet the paper.
Wet the paper in horizontal strokes first, then vertical strokes. Hold the paper to the light. If it appears shiny, you can start applying watercolors. If not, add another layer of wet strokes.
Wipe off excess water with a paper towel or rag.
Apply sweeping strokes.
Once you get the right sheen, load your flat or mop brush to water, wipe off the excess, then dip it into watercolor.
Apply the watercolor starting from the top, working in sweeping horizontal strokes. Some of the watercolors may run, especially if you're holding your board in an inclined position.
Blend in any uneven colors before you let the wash dry.
Basic Watercolor Washes
Here are the four basic watercolor washes that you can try. Artists prefer building the wash first so they don't risk making uneven washes which can potentially ruin their artwork. To get the perfect wash, you must understand how the basic washes work. Wait until the watercolor paper or watercolor canvas is completely dry before painting over it.
Flat wash

Image by Watercolor Misfit
In contrast with the other watercolor wash techniques, flat washes use one color and are the most basic of all the washes. It is best to master this technique before moving on to the other wash techniques. Reload your watercolor brush well and remove the excess pigment by blotting the brush on a paper towel or diluting your paint to create a perfect flat wash. Also, do not forget the power of clean water.
You can do a flat wash in two ways - dry and wet.
Dry flat wash
A dry flat wash is more challenging than a wet flat wash because you have to be mindful of continuing your strokes. The paint flow on dry paper is more uneven if compared with wet washes. You can do the dry wash by holding your board slightly inclined or laying it flat on the table.
To start the dry flat wash:
- Tape your paper on a flat board.
- Load your mop brush or flat brush with watercolor.
- Sweep it over the paper until the brush is too light.
- Reload your brush and continue painting. You'll usually find a thin bead from where you stopped, so start from there.
- Blend the paint with a clean, wet brush, so your paper looks uniform without any rough patches and visible brush strokes.
Wet flat wash
Wet flat wash, as the name implies, works on wet watercolor paper. The resulting wash is more even and dramatic than the flat wash's wispy and more textured finish.
Always start by taping your paper on a flat board. Wet your paper using a mop or flat brush by applying vertical strokes, then horizontal strokes. Load your brush with watercolor and apply in horizontal strokes on the wet surface. Blend with your clean brush.
Like the dry flat wash, you can also work on a tilted or flat board.
Gradient wash

Image by Susan Chiang
One of the most popular techniques in watercolor painting is using a gradient or graded wash. The goal with this type of technique is to gradually fade one color out until it becomes transparent. Graduated wash typically progresses from full strength on the upper portion and slowly moves towards lighter values on the lower portion.
Start by loading up the brush with watercolor, then apply it on paper with broad horizontal brushstrokes. Load your brush with watercolor, but dip in water to dilute the excess paint as you build the gradient down.
Move down from top to bottom, pausing in intervals to dip your brush in water until only water is left.
Variegated wash

Image by Becca Hillburn
A variegated wash is a type of transitional color that gradually blends two different colors. You can use it to create an interesting, visually pleasing effect for your painting or project.
The secret to making a great variegated wash is to pick colors that won't clash, preferably ones that will look great when mixed, like red and yellow, blue and yellow, red and blue, and their tints.
Do not mix complementary colors like red and green, yellow and purple, green and shades of red, or orange and blue unless you're rooting for browns.
The trick is to build the colors on both ends, one color on one end and the other color on the other end. Build them until they meet in the middle, then blend them.
You can do a variegated wash in two ways - build the colors evenly, so they meet and blend in the middle for an even wash or let the colors fade as they meet at the center.
Wet on wet watercolor wash
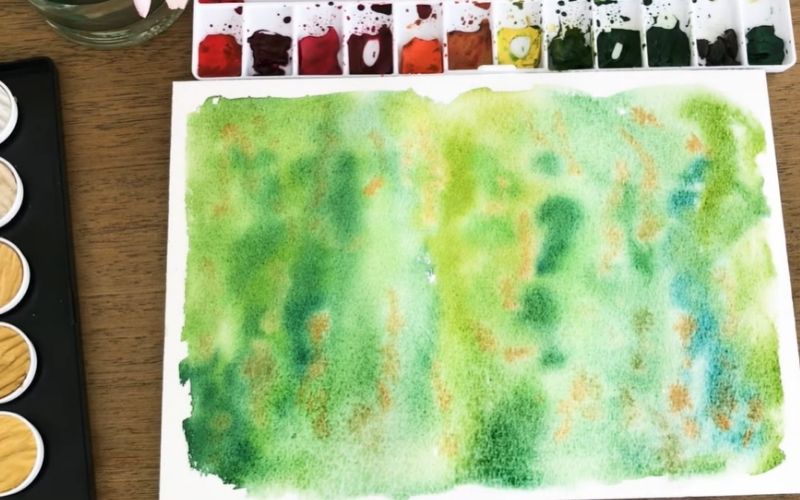
Image by Caitlin Sheffer
Watercolor painting on wet cloth is the simplest method to create. It's freer, the results unpredictable but pleasing at the same time.
To create the wet on wet wash:
- Stretch the paper by taping it on a flat board.
- Spray water on the watercolor paper, or you can use a mop or flat brush.
- Remove the excess water with a paper towel. You'll know that it's good when the paper has a slight sheen.
The trick on the wet-on-wet technique is to allow the watercolors to bloom on their own. Using a round brush, load it with watercolor, then touch the brush tip on different areas on the paper without looking for structure, going for a more abstract look.
Add more colors, but limit it to three. Again, do not go for complementary colors, though you can incorporate grays and blacks into the wet wash. Also, don't forget to leave some white spaces to give the wash a lighter finish.
Dark wash

A dark watercolor wash - Image by Liron Yanconsky
Another is to use a watercolor that reactivates so you can blend the colors well without leaving a patchy finish. You may get away with it in lighter colors, but it is close to a crime in dark colors.
While dark washes are daunting, they do give a dramatic effect to your watercolor paintings. Keep two things in mind while doing dark washes. First, the paint you use is naturally dark, so scratch off, mixing the colors to make a dark one. If you want black, use black watercolor. If you want deep browns, go with your burnt umber, burnt sienna, or coffee.
Another is to use a watercolor that reactivates so you can blend the colors well without leaving a patchy finish. You may get away with it in lighter colors, but it is close to a crime in dark colors.
Watercolor Wash FAQ
How do you smooth a watercolor wash?
The secret to a smooth watercolor wash is the inclination of both your paper and your brush. Many artists prefer keeping their board at an angle so that the paint flow is smoother.
Also, keeping your brush at an angle helps you control it better. Some artists at the ferrule, but we recommend holding the brush near the middle. This way, you can control the pressure better, and your hand won't cause a blind spot to your line of vision.
What is a two-color graded wash?
Two-color graded wash is also known as variegated wash. As the name implies, it uses two colors, where they meet the center of the paper to create a third color or make a soft wash of the third color.
You can also do the two-color graded wash using the wet on dry and wet on wet techniques like other washes.
How do you color wash your background?
Watercolor washes should be light enough to highlight the main image you're creating instead of muddied. Also, let your wash blend with your painting so it looks seamless.
For example, if you're painting an afternoon sky, yellows and oranges dominate the sky instead of blues, so use that as your wash.
Another trick is to make your background wash provide details to your painting. Again, when painting the sky, lifting off some colors with a paper towel creates clouds, and light breaks on it, creating a dimensional painting rather than a flat one.