17 Instrument Crafts For Cinco De Mayo To Brighten Your Festivity
Cinco de Mayo is a big day of celebration not only in Mexico and in many states in the US with a strong Mexican culture. While there is a misconception that Cinco de Mayo is the Mexican independence day, it is not. Instead, it is a celebration of the victory of the weaker Mexican forces over Napoleon III's more powerful army.
In 1863, a year after the victorious march in the Puebla, Cinco de Mayo celebrations began in the US, especially in states with a strong Mexican presence. Music is an essential feature of the Cinco de Mayo deliberation, with mariachi bands playing music to celebrate the victory and pains of the Mexican people.
This tutorial will show you how to make DIY instrument crafts for your Cinco de Mayo celebrations. Kids will surely love these crafts.
1. DIY Plastic Bottle Maracas

DIY maracas made with plastic bottles - Image by Playkids
Who doesn't love the sound of maracas? Now you can make your DIY maracas made from small water bottles. These simple instruments are perfect for adding some percussion music to any party or get-together. They're also great for kids to make and play with if you follow the simple instructions in this tutorial.
What You'll Need
- Plastic bottle
- Toilet paper roll
- Washi tape
- Colored adhesive tape
- Beans
- Rice
Directions
- Clean the plastic bottles.
- Fill the bottles with rice or beans.
- Cut the toilet paper roll in half, then wrap it around the mouth of the plastic bottle. Secure the end of the paper roll with colored adhesive.
- Decorate the bottles with decorative tape.
2. Paper Plate Tambourines

DIY Tambourine made from paper plates - Image by DIY Labs
The paper plate tambourine is a nifty little instrument perfect for adding some extra zing to your performances and festivals. It's easy to play, and the vibrant jingles create a delightful sound that will have everyone tapping their feet. So why not make one up today and start shaking things up?
What You'll Need
Directions
- Punch holes around the 2 paper plates, making sure to align all the holes.
- Cut 5-inch lengths from the ¼-inch ribbons, using different colors.
- Tie the ribbons to the holes, alternating the colors.
- Tie craft bells to the remainder of the ribbon to make the tambourine.
3. Soda Cap Tambourine

DIY tambourine made from soda caps and wooden stick - Image by Education
Shake it up with this fun and easy DIY tambourine made from soda caps and a wooden stick! This versatile instrument is perfect for any occasion, from concerts and parties to get-togethers and family gatherings. With its unique delivery, this tambourine will add a touch of personality to any performance. So, don't throw away your soda caps and make them into something productive.
What You'll Need
- Dowel, ¾”
- Soda caps
- Nails
- Hammer
- Acrylic paint
Directions
- Use a bigger nail to punch a hole into the soda caps. You need 6 or more caps for each tambourine stick.
- Use smaller nails to secure the soda caps to the dowel.
- You can paint the soda caps with Mexican colors and dowel white.
4. Milk Can Drum
DIY drum made from milk can and rubber balloon - Image by Creative Flower
Check out this ingenious milk can drum made from a recycled milk can and a rubber balloon–materials that are easy to find and buy from your nearby shops. Stretch the balloon over one end of the can, and it can deliver an awesome tribal sound that will make everyone get up and dance to the beat.
What You'll Need
- Rubber balloon
- Acrylic paint
- Sponge brush
- Empty milk can or chip can
- Adhesive tape
- Washi tape
- Hot glue and glue sticks
- White glue
- Dowel, ¼-inch
- Wooden beads
Directions
- Cut off the end of the balloon, so only the round part remains.
- Stretch it over the mouth of the can. You can cover the whole can with the balloon if you're using a smaller can. Cover the rest of the can with construction paper if the can is large.
- Decorate the drum with stickers and washi tape of various colors.
- Glue a wooden bead to one end of a dowel. Paint it with the acrylic paint of your choice.
- Decorate the stick with washi tape.
5. Construction Paper Xylophone

Construction paper xylophone - Image by Crafty Magic With Hinnah
Ready to make some make-believe music? The paper xylophone is perfect for everyone who loves crafting because it is extra easy to use. You can use either cardstock or foam sheet to make this xylophone. You can use jumbo popsicle sticks for a more challenging craft, cut appropriately to their required length.
What You'll Need
- Colored cardstock
- White glue or Hot glue and glue sticks
- Permanent marker
- Barbeque stick
- Washi tape
- Glitter foam
Directions
- Make five xylophone bars with colored cardstock or foam sheet.
- Make the xylophone's base and horizontal bars with the same material as the xylophone bars.
- Glue the parts together and make accents for the xylophone.
- Wrap a barbeque stick with washi tape and glue the end of the barbeque stick to the back of a glitter foam coin.
6. Soda Cap Castanets

Castanets made from soda caps and cardboard - Image by Make Film Play
The soda cap castanets are a one-of-a-kind musical instrument that will add a touch of fun and flair to any performance. These castanets use recycled soda caps and cardboard, making them a great eco-friendly choice yet practical and easy to make. These castanets' colorful designs and different sounds make them a favorite among young musicians.
What You'll Need
Directions
- Make 2 oblong cutouts (1 ½ x 5 inches) from thick cardboard.
- Paint it with acrylic paint, using the color of your choice. Let it dry.
- Fold the cutouts in half.
- Glue the soda caps to both ends of the cardboard cutout.
- Decorate the castanets with Cinco de Mayo stickers.
7. DIY Rain Stick

DIY rainstick made from corrugated cardboard - Image by DIY Labs
The origin of rain sticks is not sure, but historians attribute its invention to the Mapuche tribe of Chile or the Incas. The Chileans use them to ward off evil spirits that prevent the rain. On any other festival, it sets the tempo of your music without going overboard.
What You'll Need
- Paper towel roll
- Corrugated cardboard
- Construction paper
- Adhesive tape
- Pipe cleaners
- Stapler
- Rubber bands
- Rice
- Raffia glass ribbon
Directions
- Cut two circles from construction paper. Make them larger than the circumference of the paper towel roll.
- Join two pipe cleaners together with an adhesive tape.
- Roll the pipe cleaners around your fingers to make a coil.
- Push the spiral pipe cleaner into the paper towel roll, and staple the pipe cleaners to the end of the paper towel roll.
- Cover one end of the paper towel roll with one construction paper circle, then seal it with a rubber band.
- Add ¼ cup of rice into the paper towel roll and seal the other end with the construction paper and raffia grass ribbon.
- Finish the rain stick with a raffia grass ribbon on the other end.
8. Shoebox Guitar

Guitar made from a shoebox, rubber bands, and colored pencils - Image by Ketchup & Mustard
The shoebox guitar is a unique and innovative take on the classic guitar, using recycled materials - a shoebox, some rubber bands, and colored pencils you no longer use. The resulting instrument sounds surprisingly good for a DIY instrument, with a warm and hollow tone perfect for making music that kids love.
What You'll Need
- Cardboard shoebox
- Craft knife
- Pencils or colored pencils
- Hot glue and glue sticks
- Rubber bands
Directions
- Cut out a circle from the lid of the cardboard shoebox.
- Glue the lid to the shoebox to seal it close.
- Glue the colored pencils to the lid to resemble the guitar bar.
- Use the rubber bands for the guitar strings.
9. Straw Panpipes

Straw panpipes - Image by The Winkle
Perfect for gifts, decoration, or simply entertaining yourself, this drinking straw panpipe makes a good sound that your kids can use to play simple tunes. Open this tutorial to see how to use this panpipe.
What You'll Need
Direction
- Cut the straw into 2 ½, 3, 3 ½, 4, and 4 ½ inches.
- Decorate two popsicle sticks with washi tape.
- Cut 5 glue dots and stick them to the inner side of the popsicle sticks. Do this on the two popsicle sticks.
- Measure ½ inch from the top of the longest straw, then glue it on the first glue dot on the popsicle stick. Do this on the rest of the straws until you get to the shortest one.
- Stick the other popsicle stick on the straws to finish the panpipe.
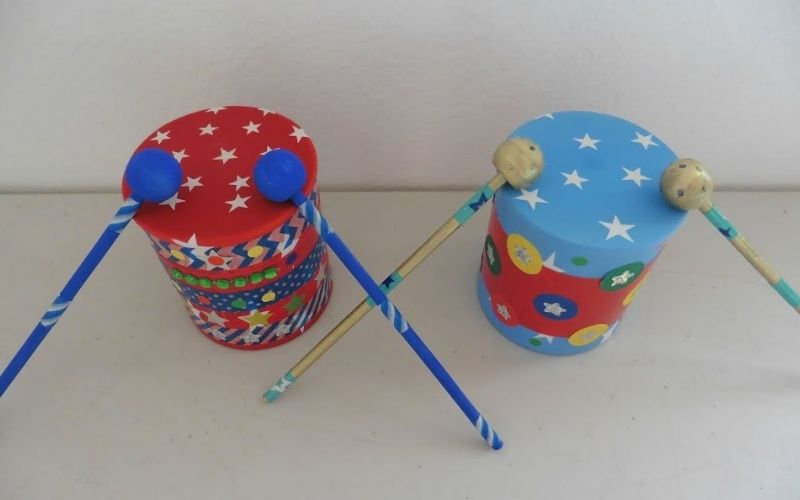
10. Paper Cup Damaru
Drum made from disposable cups - Image by Mana Creative Corner
Though the damaru is not part of the Mexican or Latino culture, this drum is a very good choice for instrument crafts that you can make with your kids for Cinco de Mayo. With very simple and easy-to-source materials, you can make this paper cup damaru with your kids in no time!
What You'll Need
- Paper cups
- Adhesive tape
- Toothpicks or matchsticks
- Acrylic paint
- White glue
- Macrame string
- Wooden beads
Directions
- Tape the two paper cups together, the bottom part together.
- Paint the paper cup with acrylic paint.
- Once the paint is dry, glue toothpicks or matchsticks to decorate the drum.
- Wrap a macrame string around the middle of the drum several times.
- Leave a 3-inch string on each end. Secure the wooden bead at the end of the string.
- Cut a straw or dowel in half for the drum sticks.
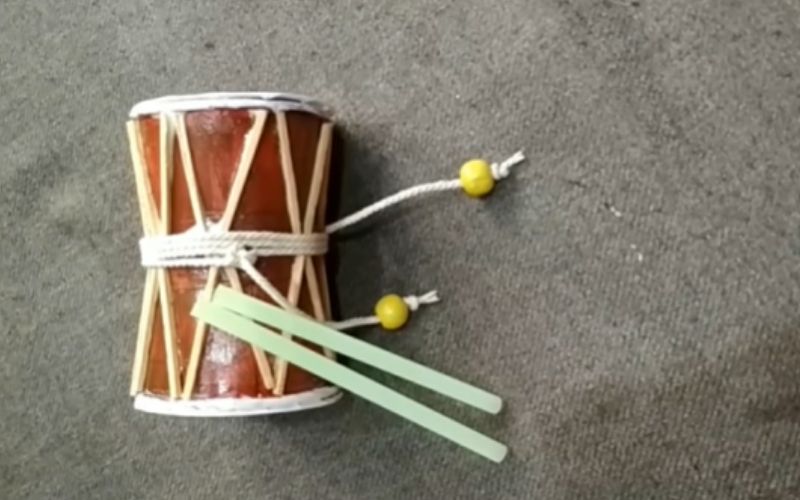
11. DIY Timpani Drum

DIY timpani drum covered with rubber balloons - Image by Mr. Creator
If you have a passion for music or looking for a new and interesting hobby, you can try these DIY timpani drums covered with rubber balloons. This unique and innovative product is fun and easy to use, and it's guaranteed to produce amazing results. You can make a beautiful, melodic sound that will impress your friends and family.
What You'll Need
- Chip can
- Baker's twine
- Construction paper
- Craft knife
- Wooden beads
- Rubber balloon
- Hot glue and glue sticks
- Adhesive tape
Direction
- Cut a 4cm section from a chip can.
- Roll a construction paper on a pencil.
- Poke a hole on one side of the chip can section.
- Put the rolled construction paper into the hole and secure it with a shot of hot glue.
- Poke two opposite holes on the chip can with a small screwdriver or nail.
- Put a string through the holes and secure them with a double knot. Add a bead to both ends of the string.
- Cover both sides of the drum with a balloon.
- Wrap washi tape around the drum to finish it.
12. Paper Flute

A paper flute - Image by Happiness is Handmade
This unique instrument is crafted from a single sheet of paper, carefully rolled, and shaped into a beautiful flute. Though this one doesn't sound, it still makes a beautiful decoration for your Cinco de Mayo festivals. Decorate the flute with colorful ribbons.
What You'll Need
- Scratch paper
- Construction paper
- White glue
- Pencil or small pipe
- Satin ribbons, ¼"
Directions
- Use a pencil or a small pipe to roll the paper to form the flute.
- Wrap construction paper around the flute.
- Decorate the flute with strips of construction paper and dots for the holes.
- Wrap one end of the flute with colorful ribbons.
13. Popsicle Stick Harmonica

DIY harmonica made with rubber bands and popsicle sticks - Image by Tom Tom Kidz Club
The Popsicle Stick Harmonica is an excellent choice for those who want a DIY instrument that their kid can have fun with. This instrument works, even if it's a single tone. This craft is also a great way to teach your youngster about music.
What You'll Need
- Popsicle sticks
- Strips of printer paper
- White glue
- Rubber bands
Directions
- Cut a ½ x 8 ½-inch strip of paper from printer paper.
- Wrap the rubber band along the length of the popsicle stick. Keep it flat on the stick.
- Wrap the paper strip on both ends of the other popsicle stick. Secure the ends with glue or adhesive tape.
- Place the popsicle stick with the rubber band on top of the stick wrapped with the paper strip.
- Tie a rubber band around the ends of the popsicle stick where the paper strip is wrapped.
- Decorate the harmonica with cute drawings and googly eyes.
14. Jingle Sticks

Jingle sticks made from dowel sticks and ribbons - Image by Craft2Care
Introducing Jingle Sticks, the perfect addition to any holiday celebration. With the purpose of being shaken, these musical instruments use dowel sticks and ribbons and emit a delightful jingle sound. These sticks are sure to bring a touch of fun and excitement to any gathering. After the celebration, you can stash your instruments with your Christmas decorations.
What You'll Need
- Dowel, ½ inch
- Acrylic paint
- Paintbrush
- Craft bells
- Pipe cleaners
- Satin ribbons, ¼”
Directions
- Paint the dowel with acrylic paint. Let it dry.
- String several craft bells to a pipe cleaner.
- Wrap the pipe cleaner around the upper third of the dowel.
- Tie another pipe cleaner of a different color and wrap it back up to the topmost part of the dowel.
- Tie a satin ribbon to the tip of the jingle stick.
15. Construction Board Accordion

Construction board accordion - Image by Fab Art n Crafts
An accordion is a good DIY instrument to make to celebrate Cinco de Mayo crafts for several reasons. It is easy to make, uses simple craft materials, and accordion folding is a very common craft to make.
What You'll Need
- Construction paper
- Googly eyes
- Permanent marker
- White glue
Directions
- Cut a letter-size construction paper lengthwise. Fold this paper into ½-inch accordion style.
- Make a ¾ x 4-inch strip from a different color of construction paper.
- Glue the strips to the end of the accordion.
- Make a keyboard from white and blue construction paper.
- Divide the white construction paper into 10 sections using the permanent marker.
- Make the black keys on the keyboard.
- Glue the keyboard to one end of the accordion and a handle to the other.
- Decorate the accordion with googly eyes and a mouth.
16. Cardboard Harp

Makeshift harp made with cardboard and rubber bands - Image by Little Lado
This makeshift harp uses several layers of cardboard designed to mimic the look of a real harp. The unique design gives you a blank canvas to create your artwork, giving it a lovely finish.
What You'll Need
- Cardboard
- Harp template
- Pencil
- Craft knife
- Screw
- Rubber bands
- Acrylic paint
- Permanent marker
Directions
- Trace the harp template on the cardboard and cut out the excess cardboard pieces. Make 5-7 of these cardboard harp frames.
- Tap the screw into the harp frame.
- Paint the harp frame.
- Draw your decoration on the harp frame.
- Attach the rubber band strings to the screws.
17. Bottle Cap Sistrum
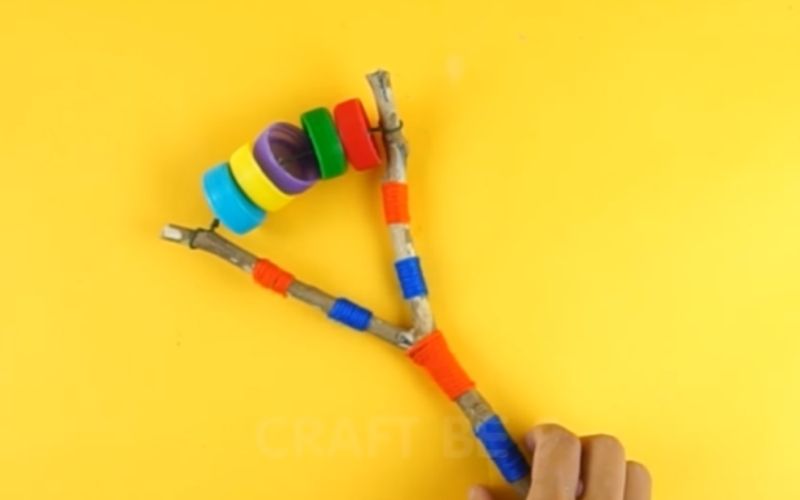
A DIY sistrum made from a tree branch and plastic bottle caps - Image by CraftBe9
A sistrum is a unique and fascinating ancient Egyptian musical instrument that is believed to welcome the presence of a deity. Though traditionally has nothing to do with the Cinco de Mayo celebration, this easy-to-make craft instrument is a great addition to your decorations.
What You'll Need
- Tree branch
- Plastic bottle caps
- Hot glue and glue sticks
- Colored wires
Directions
- Make a hole in the plastic bottle caps.
- Stick the wire into the holes of the bottle caps.
- Wrap the ends of the wire on a Y-shaped branch.
- Decorate the branch with colorful wires.
10 Cinco de Mayo Facts and Trivia You Should Know
- The city where the Battle of Puebla happened now bears the name Puebla de Zaragoza in honor of the unlikely hero of the battle, Ignacio Zaragoza.
- Cinco de Mayo is not listed as a national holiday in Mexico. Labor Day (May 1) is a bigger holiday in Mexico. Schools are closed on this day, though.
- Beer and tequila are the main alcoholic beverages during the Cinco de Mayo celebrations in the US.
- Latino communities protested the commercialization of Cinco de Mayo in the US.
- President Franklin Roosevelt used the Cinco de Mayo celebration to improve US relations with Latino communities.
- Avocados are a big hit on Cinco de Mayo. Americans consume lots of guacamole on this day.
- Not all food served during the Cinco de Mayo celebrations is authentic Mexican cuisine.
- California was the first US state to celebrate the holiday in 1863 after they heard of the victory of the Mexican soldiers.
- Get an overload of Mexican music and dance on Cinco de Mayo.
Cinco de Mayo is not complete without the Mole Poblano, a dish from the city of Puebla and the official dish of the celebration.
Conclusion
Go ahead and try these DIY instrument crafts for Cinco de Mayo with your kids. They're easy enough that your kids can help you make them, and they'll be able to have a blast playing with them long after the celebration is over. And who knows, you might just find yourself tapping into your inner mariachi band member by making one (or all!) of these instruments. Have fun!