How To Make A Leather Bag For The First Time

Few can rival a leather bag's timeless elegance and enduring appeal for handmade items. Skilled craftsmen have been transforming leather into stylish and durable bags for centuries. Today, this tradition of craftsmanship continues, but you don't need years of training to make a leather bag. With patience, the right tools, and guidance, anyone can create a beautiful, long-lasting leather bag from scratch. This article is designed to guide you through the process step by step.
1. Selecting The Right Leather

Selecting the right leather for your bag is crucial to ensure its durability and appearance. Cowhide is a popular choice due to its durability and ease of handling. It is known for its strength and ability to withstand wear and tear, making it ideal for bags that will be used frequently. Additionally, cowhide is available in various finishes, such as full grain and top grain, offering different levels of quality and texture.
While cowhide is a common option, other types of leather can also be used based on your preferences. Goatskin, for example, is known for its softness and flexibility, making it suitable for creating bags with a more luxurious and supple feel. On the other hand, Lambskin is prized for its buttery smooth texture and lightweight nature, making it a great choice for creating elegant and lightweight bags. Although less commonly used, Pigskin can be a more affordable option and provide your bag with a unique grain and texture.
2. Gathering Necessary Tools

Gathering the necessary tools before starting is essential to ensure a smooth leather bag-making process. A sharp knife or leather shears is a must-have tool for cutting the leather pieces accurately. A ruler or tape measure is needed to correctly mark the pattern and measurements.
A sewing awl or sewing machine suitable for leatherwork is essential to sew the leather pieces together. A sewing awl can help you create finer stitches and be easier to handle than a sewing machine. Additionally, needles and thread suitable for leatherwork are necessary for the sewing process. Waxed thread is commonly used for leatherwork as it provides strength and durability to the seams. With these necessary tools, the leather bag-making process can be more accessible, and the results can be refined.
3. How To Punch Holes In Leather
The next step is preparing the leather for sewing. Leather is a notorious material for being difficult to punch holes into, so you need to purchase a specialist punch to do this properly. Maun Punches include a range of options for punching through thick leather, using lever assisted technology to make it a lot easier to do repeatedly, excellent for making a leather bag.

'Revolving Punch by Maun'
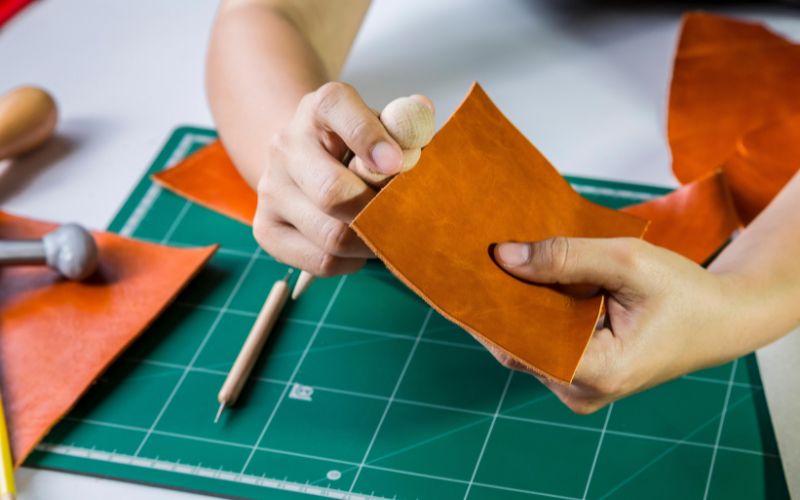
4. Crafting The Leather Bag

Crafting your leather bag involves precise cutting and hole punching for seamless assembly. Cut the leather to your desired size, ensuring clean and straight cuts that produce a polished final product. The next step is to punch holes along the edges of the leather pieces, where the bag will be sewn together. Using a Maun punch, ensure that the holes are evenly spaced and consistent in size, providing a professional and neat appearance to your bag.
By cutting accurately and punching holes evenly, you can ensure that your leather bag will come together seamlessly, resulting in a well-crafted and visually appealing finished product. These steps are crucial to maintaining your leather bag's quality and aesthetics.
5. Burnishing The Edges
After cutting the leather for your bag, you may find that the edges appear rough or unfinished. You can burnish the edges using an edge beveler and edge slicker to achieve a more polished look. The edge beveler helps to remove sharp corners and smooth the edges, while the edge slicker further smooths and seals the edges using friction and water.
Burnishing the edges can enhance your leather bag's overall appearance and durability. This process gives a refined and professional touch, ensuring that the edges are smooth and well-finished, adding to the overall quality of your crafted bag.
6. Creating A Pattern

If you prefer a more precise approach or lack confidence in free-handing the dimensions, consider creating a pattern on paper for your bag. This allows you to make adjustments and ensure the desired outcome. Remember to include a seam allowance in your pattern to account for sewing. Carefully cut out the pattern using sharp scissors, ensuring accuracy in the shape and size of your leather pieces.
Creating a pattern gives you more control over the final result, ensuring that your bag matches your vision. It also enables you to replicate the design in the future. It serves as a useful guide during the cutting and sewing process, enhancing the overall quality of your finished bag.
7. Adding Pockets And Compartments
To incorporate pockets or compartments into your bag design, cut additional leather pieces and sew them onto the inside. Take precise measurements and use markings to ensure the pockets are level and evenly spaced. This attention to detail ensures that your bag looks visually appealing and provides functional storage solutions, allowing you to easily organize and access your belongings while maintaining the overall integrity of the bag's design.
8. Embossing And Stamping

You can use leather stamps or embossing tools to add patterns or designs to your leather bag for a personal touch. By doing so, you can make your bag unique and distinguish it from others. Embossing and stamping are creative and enjoyable techniques allowing you to express your individuality and make a statement with your bag's design. Get creative and experiment with various stamps and embossing tools to create a truly one-of-a-kind look for your leather bag.
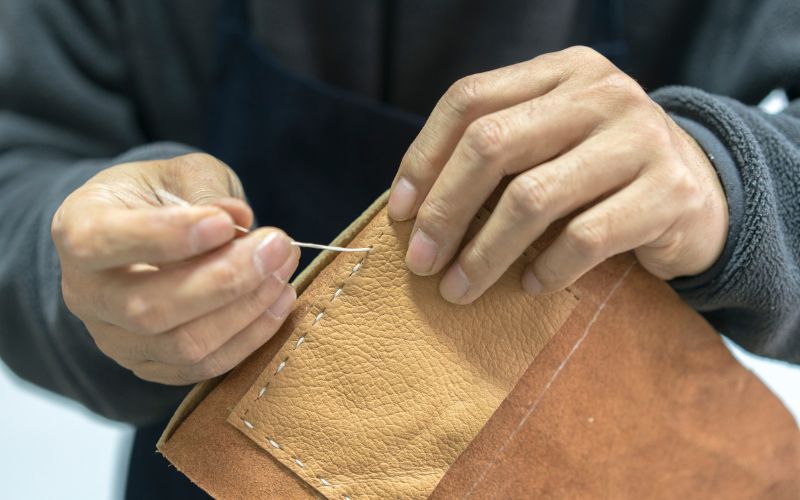
9. Sewing The Bag Together

Once the holes are punched, widen them with the awl to prepare for sewing. Take a piece of waxed thread twice the length of your bag and thread it through a leather needle.
To sew the bag together, insert the needle inside the bag through the first hole, then out through the second hole. Continue sewing with a simple running stitch until you reach the end of the thread. Repeat this process on the other side of the bag, ensuring a secure and even seam that holds the leather pieces together.
10. Adding The Strap And D-Rings

After sewing your leather bag, it's time to add the strap and D-rings. Cut the leather strap to your desired length and sew the D-rings onto the ends. Ensure the D-rings are securely stitched in place.
Next, sew the straps onto the bag, paying attention to their alignment and adding sufficient reinforcement to support the bag's weight. Carefully stitch the straps in place, ensuring they are level and securely attached, offering functionality and a polished appearance to your leather bag.
Conclusion
Making a leather bag for the first time can be daunting, but with the right tools and materials, you can create a beautiful and functional bag that you'll be proud to use. Remember to take your time and pay attention to the details. Happy crafting!